You ever have those times where you know exactly what you need, but can’t seem to find it?? I was getting tired of having all of my highlighters and pens that I use during my bible study loose all over the house. I’m sure John was tired of seeing them spread out on the shelves in the living room too 🙂 I really only use these highlighters and pens for my bible so I don’t keep them with the rest of my office supply stash (there is a stash) so they kind of float around with my bible. I was going to just buy a pencil case, but thought that wouldn’t solve the problem of them still floating around separate from my bible!
I got it in my mind that I wanted them to strap onto my bible with elastic, but didn’t really find anything (not that I looked that hard!). I knew I had hoarded some felt and embroidery thread in my craft room, so I broke it out and got to creating!
Seriously, y’all. If you know how to work a needle and thread, you can do his project and they turn out so stinking cute!
Here’s what you’ll need:
Two sheets of felt (from any craft store or I got mine at Walmart)
Embroidery thread
Needle
Scissors
Snap tool — I have this one (aff) (if you don’t have this tool, just make a button hole and use a button instead!)
To start, lay your two pieces of felt on top of each other.
Fold up your felt up, leaving enough room for a flap. This will depend how big you want your pencil case to be. I wanted mine to be pretty big because I keep colored pencils around too!
While the felt is folded up, fold it in half the other way. Cut along a line like the one below, making a flap like an envelope.
Then I rounded out the corners.
This is when I cut my elastic for the strap. I cut it about 1/2 inch longer on each side of the pouch so I could fold it around to sew in. (Color switch! I made a few of these 🙂 )
Now, you can start sewing! You could use a sewing machine if you are into that sort of thing. I’m more of a sit on the couch and hand sew kind of girl. Plus, I love the look of a blanket stitch in contrasting thread. So handmade. Whatever floats your boat!
I’m not going to attempt explaining a blanket stitch. Here’s a YouTube video.
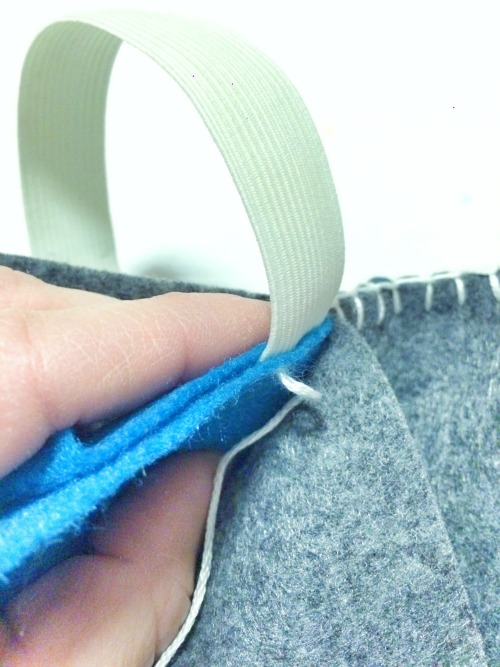
Start at one bottom corner, stopping half way up to sew in your elastic (if you want). Don’t worry about the blanket stitch here, we’ll get back to that! I just ran my needle and thread across the elastic twice so I ended up back where I left off.
Now you can start back on your blanket stitch. You’ll only be doing a blanket stitch on the front side of the pouch (the back will be covered with the elastic) until you get to the other side of the elastic.
Finish that side and then work along your envelope flap, then back down the other side (stopping to sew in the elastic just like the other side.
Don’t finish off the thread at the bottom corner, but thread it through the inside of the pouch so it pops up at your opening. Then you will blanket stitch along the top edge of your pouch.
So cute, right??
Now, if you have a snap tool, put a snap in the middle of your flap and edge of pouch.
If you have a button, make a button hole (cut a slit slightly smaller than your button) and sew your button to the inner edge of your pouch. You may want to blanket stitch around the button hole to make it a bit more sturdy because felt will stretch out.
It’s exactly what I was looking for! Now I get to keep all of my things corralled together, right where I need them 🙂 Mine holds 5 highlighters, 2 pens, and a 24 pack of colored pencils! With room for more!
These would make awesome stocking stuffers and can be used for school, makeup, money, or anything! The possibilities are endless!
Now go make one or 15.
xo
Sam
Related posts:
Powered by YARPP.


